Hosting ClojureScript SPA using Shadow-cljs on Netlify

Building ClojureScript Single Page Applications (SPA) on Netlify just works. The following instructions require no prior knowledge of neither Netlify nor build tools (like Shadow-cljs, WebPack etc.), but some knowledge about HTML and Git is expected.
Setup a ClojureScript SPA project
SPA projects come in all shapes and sizes, causing equal diversity in paths for compiled code and build commands. Most of the time, differences are small even subtle. But for an automatic build service (including Netlify) these things needs to be exactly right. The following description assumes a ClojureScript project setup matching the Shadow-cljs “Quick Start” guide (snapshot from Feb. 17. 2022 - Shadow-cljs v2.17.3).
Updated 2026-01-18: Newer versions of shadow-cljs (since 2.19.7) require Java versions which isn’t included out of the box by Netlify. The problem was reported on GitHub in the now archived build-image repository, and I’ve documented a workaround that downloads, (caches,) and installs a newer Java version automatically during builds.
The result of the “Quick Start” guide summed up:
- Run
npx create-cljs-project <project-name>to create a new ClojureScript project - Add “Hello World” code
- Setup a Shadow-cljs build named
frontend. The same name is used in the examples below - Add
index.htmlpage that uses the “Hello World” code
Notice: The link to the “Quick Start” guide is a snapshot to ensure the instructions found on this page will remain correct. But do checkout the newest version of the guide as well.
Wrap up the project by pushing the code to a Git repo (Netlify supports GitHub and GitLab among others.)
Setup Netlify
From Netlify’s “Team overview” click Add new site, select Import from existing project and choose the repository and branch created above.
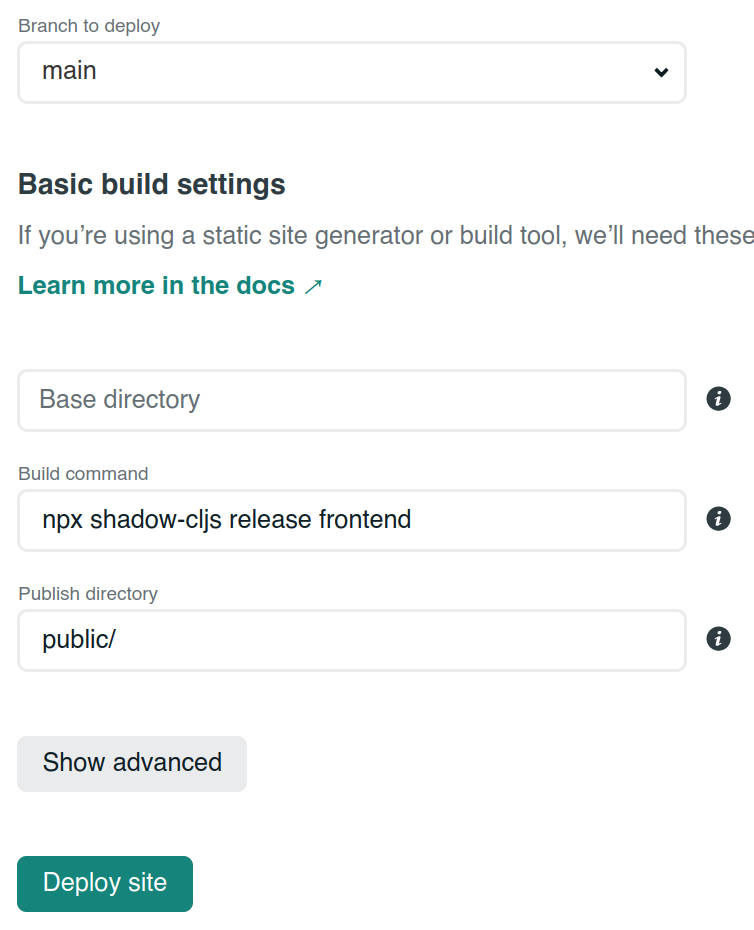
While npx shadow-cljs watch frontend is used for that neat “Live update” local developer experience. All the build optimizations are reserved for “Releasing”, which means a Netlify production build would require the following as its Build command:
npx shadow-cljs release frontend
For more information about compile, watch and release builds, see Basic Workflow. As the project advances (i.e. includes CSS), it is very likely that the “script” section of package.json should be leveraged instead of calling shadow-cljs directly.
By default, Shadow-cljs puts all JavaScript files it builds in the public/js directory. Files for publishing needs to stay in the same directory, which is why the “Quick Start” guide gave detailed instructions for index.html content and location. Netlify requires the following as its Publish directory to match the SPA project setup:
public/
Often several things need to be aligned to get the publishing directory content just right. Luckily, the above setup is simple 😅
Netlify should now look something like this:
Now deploy the SPA and open it in a browser. It will just be a blank page, but in the Browser Console Hello World will be printed.

Put the URL in control
For more advanced Single Page Applications, it’s normal to use a routing library (e.g. Reitit) and put the URL in control of which “page” is being shown. While staying in the comfort of the local developer experience, this just works because the Shadow-cljs webserver will…
by default … serve all static files from the configured paths, and fall back to index.html when a resource is not found
Source: Shadow-cljs User Guide
But when the SPA is published on Netlify this is no longer the default behavior.
Luckily, it is easy to add “Rewrite rules” for a Netlify app by adding a file in the Publish directory (public/_redirects) with the following content:
/* /index.html 200
See Netlify documentation about “Rewrites and proxies”.
Now there is no excuse for that awesome ClojureScript SPA not being available online 😉
